Engineered Wood Flooring Installation
Our wood floors should only be installed by an experienced wood flooring fitter. The following guide details step by step the installation process and should be read and fully understood by your installer.

Step 1 – Before Your Flooring Arrives
Relative Humidity Must Be Correct
The Relative Humidity (RH) which is a measurement of how much moisture is present in the air. The correct RH of a room’s atmosphere, for wood flooring to be installed, falls between 45-65% with an ambient temperature between 18 to 24°C. If necessary employ a dehumidifier to maintain suitable conditions.
NOTE: Wood Floors are generally not suitable for bathrooms where there is regular running water or an accumulation of water vapour.
Wet Trades & Decorating Should Be Dry
All wet trades such as concreting, screening and plastering should be completed and the building should be thoroughly dried out. Wood is a hygroscopic material and will absorb any excessive moisture which can cause problems.
NOTE: Plaster may take several months to dry satisfactorily and concrete screeds depending on thickness may take considerably longer. As a rule of thumb drying time for cement and water based screed is one day per millimetre for the first 50 mm and unto 2.5 days for each subsequent millimetre.
IMPORTANT: As with all screeds please consult the manufacturer for precise drying times and accelerated drying with heat should be avoided as this may weaken the screed. Decorating should be completed where possible, and paint should be completely dry as this can also add moisture to the room. Any sanding should be done before the floor is laid as fine dust can permeate into the wood and can be impossible to remove without damaging the surface.
Do not cover a floor for extended periods of time
IMPORTANT: Avoid covering the floor with non-breathable ‘protective’ sheeting, which if left on the floor, can cause condensation which can stain the floor and in turn will damage the surface.
IMPORTANT: When covering a floor to protect from other trades, it is important to make sure no dust, grit or debris gets beneath the covering as this will scratch the surface.
IMPORTANT: Tape should not be applied to the surface of the floor for longer than is necessary to apply a coat of paint to an adjacent surface. Only specialist low adhesion masking tape should be used.
Room Temperature Must Be Just Right
Room Temperature will have an effect on relative humidity and should be stable before your flooring is delivered to site. Heating including underfloor heating should be fully tested and working for at least two weeks before the flooring is laid. Room temperature should be between 18 to 24°C.
Direct Heat Sources Must Be Insulated
Flooring must not be exposed to excess heat such as from hot water pipes below floors.
Step 2 – Preparing The Subfloor
Subfloor Preparation
The subfloor is key to a successful installation and will help ensure your floor performs to its very best. The subfloor is likely to be either wooden or a cement based screed.
Sweep and vacuum to remove any dust and debris, Any decorators dust should be removed as this can be very abrasive and hard if not impossible to remove from the surface of a floor without drastic sanding and resealing. Existing floor coverings should be removed, this includes carpets, underlays, parquet blocks, ceramic tiles and any adhesive residues should be removed. It is important to do this so the subfloor can be verified as stable.
Subfloors Should Be Level
The subfloor must be free from excessive undulation and flat to within 3 millimetres over 2 lineal metres across the whole floor area. This means a maximum 3 mm gap under a 2 m long straight edge, at any point across the subfloor. Failure to keep to these tolerances may result in squeaking or deflection which may produce undue stresses on the joints, cause gaps between flooring elements and with fully bonded floors may result in inadequate contact between flooring and adhesive.
Subfloors Should Be Structurally Sound
Wood Flooring should only be laid on a subfloor which is structurally sound and free from movement. To prevent movement wooden subfloors must be of load bearing strength and free from deflection under loading. Suspended wooden subfloors should typically consist of a suitable board of 22 mm thickness on joist or battens at 600 mm centres or 18 mm thickness on 400 mm centres. For other types of suspended floor please check with the manufacturer.
Moisture Content Of Wooden Subfloors
Wooden sub-floors should contain no more than 11% moisture content and must not be more than 2% higher in moisture than the Wood Flooring. When installing wood flooring at ground floor level (or below) above a ventilated cavity (e.g. floorboards suspended on joist), it is essential that a purpose made moisture barrier building paper is installed over the sub-floor before flooring can be installed. The moisture barrier must taken up the walls by 30 mm at the perimeter, and all joints overlapped by a minimum 200 mm and taped with a water proof jointing tape.
Moisture Condition Of Concrete Subfloors
Concrete slabs and sand-cement screeds must be sound, dry, free of laitance and other substances which may impair adhesion (e.g. Bitumen adhesive residues etc). Mineral based sub-floors must be less than 75% equilibrium relative humidity and less than 65% relative humidity for glue down of engineered flooring. Anhydrite screeds must be less than 0.3% actual moisture content. Sub-floors at ground level or below must contain an effective damp proof membrane to protect flooring from ground water in compliance with British Standards. If there is any doubt that the sub-floor meets the required standard for moisture or the sub-floor does not have an effective integral damp proof membrane, a suitable surface applied damp proof membrane must be installed.
Step 3 – Once Your Floor Arrives
Acclimatisation
Acclimatising is used to balance the wood flooring with the environment it is going to be used in. Once you are satisfied that the correct preparations have been made, your floor can be delivered and as part of your guarantee conditions, it is essential to acclimatise your flooring prior to installation. Your floor should be kept in it’s sealed, unopened boxes and should only be laid flat, ideally in the room in which it is to be installed or as close to typical living conditions as possible.
IMPORTANT NOTE: Do not store packs outside or anywhere with different ambient conditions to the rooms where it is to be installed. If your flooring is not correctly acclimatised planks can warp and bow and become difficult or impossible to install. Engineered wood floors should acclimatise for at least 3 days and solid floors should have at least 7 days. Note: A certain amount of bowing in engineered floors is common and if the bowing is no more than 25 mm then these boards can be installed and will lay flat with a random staggered laying pattern.
NOTE: V4 Wood Flooring should be acclimatised in it’s sealed packaging. As the packs are not airtight and allow the wood to breath whilst supporting the boards so that they do not warp.
Step 4 – Planning The Installation
Type Of Installation
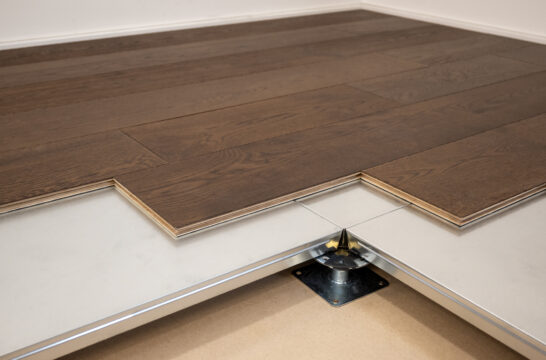
Engineered floors can be installed as floating floors over Wood’s Good underlay or fully bonded using a recommended Flexible MS adhesives. 18 -20 mm floors may be fixed to wooden subfloors using secret nails.
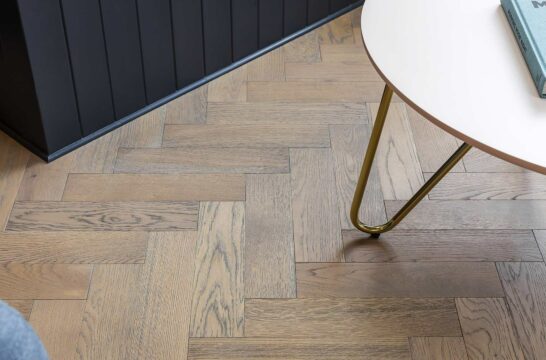
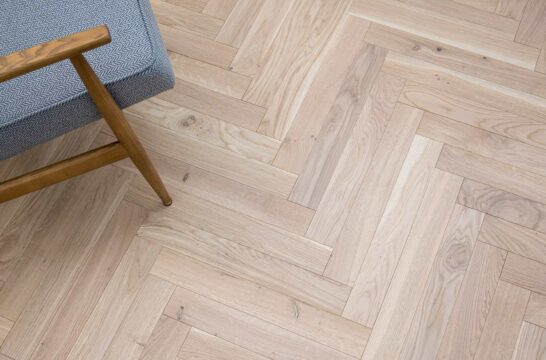
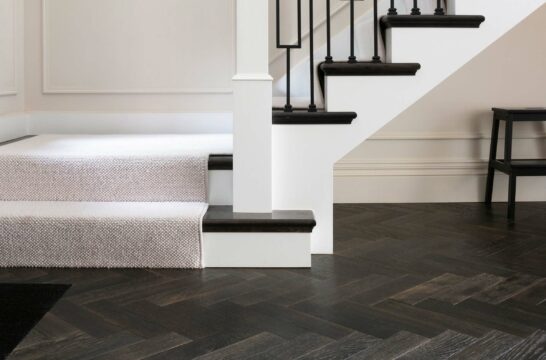
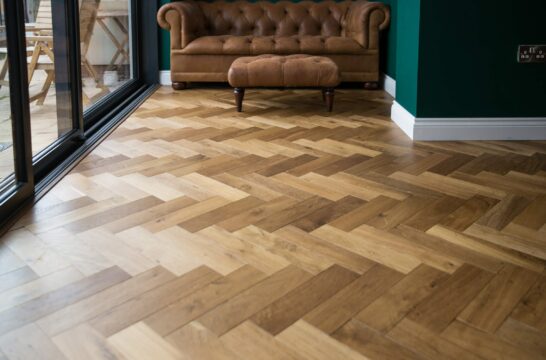
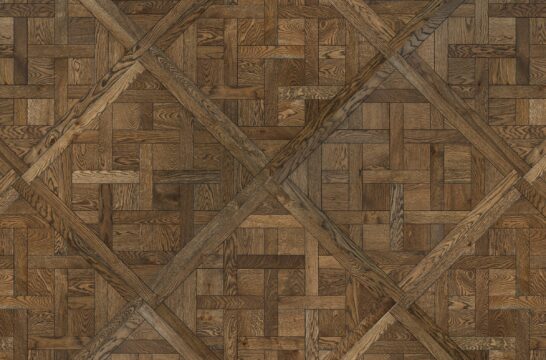
IMPORTANT NOTE: Engineered Parquet Floors such as Herringbone, Chevron and Design Panels must be installed as a fully bonded floor using flexible adhesive. If you are unsure at time of install please contact us for more information.
Direction Of Floor
Where practical install floor parallel to the longest walls so that the direction of greatest potential expansion (i.e. across the width and grain) does not coincide with the direction of greatest dimension of the floor, especially in large areas. Before you install the first row measure the width of the room and divide this measurement by the width of the board, this will give you the number of rows of boards. This is useful as the last row should not be less then 60 mm. If it is then the first down should be rip cut along the length to make the last row wider.
When Your Are Ready To Lay – Check For Defects
Check each board before it is installed for possible damage or defects, this is important as installed defects are the responsibility of the installer as the installer is the last line of quality control.
The Installer Is The Last Line Of Quality Control
Samples must be taken as a guide only and colour/shade and other characteristics will vary. Before installation commences rack out a small section of boards for the client approval. The installer is the last line of quality control. This product may include up to 3-5% of boards which do not meet the normal tolerances or grade.
NOTE: The installer is the last line of quality control.
DO NOT INSTALL BOARDS WITH OBVIOUS DEFECTS.
Wastage
Wood flooring should always be over ordered by 10% of the actual area required. This allows for wastage material which may include boards with natural blemishes or filled knots that are within the grading tolerance but are not your taste. It is also good practise to keep at least a pack of flooring stored in case flooring from the same batch is required for any unforeseen repair work.
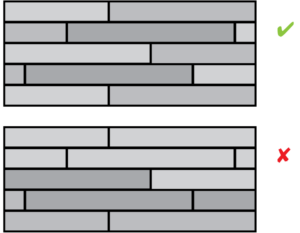
To achieve the desired mix of colours, shades and other characteristics in the final floor, and to avoid clusters of characteristics such as knots, the contents of multiple packs should be mixed during installation. Avoid Grouping similar colours and grain pattern By not mixing the planks before installation areas of dark and light planks can look patchy and out of place
.
Laying Pattern
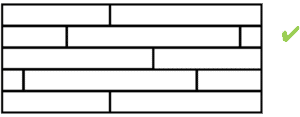
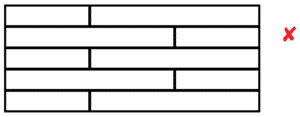
For installation of flooring planks which run in the same direction, header-joints must be staggered by a minimum of two board widths apart. It is also important to even patterns across the floor as this can cause dimensional weaknesses as the floor expands and contracts.
Correct Staggered Laying Pattern
Incorrect Pattern – Header Joints Are Too Close

Incorrect Pattern – Header Joints Lined Up Across The Floor
Step 5 – Floating Installation
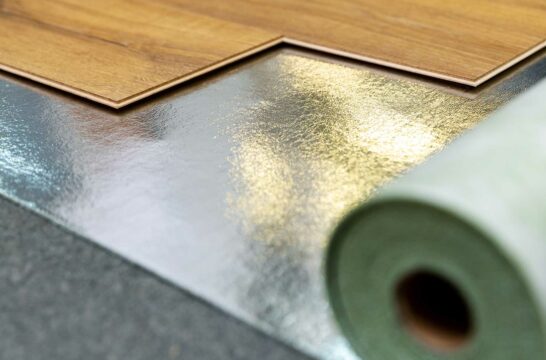
With the exception of our Tundra PlankM collection, our engineered plank wood flooring may be installed as a floating floor, which means that the boards are joined together and loose laid over the subfloor, instead of being fully bonded with adhesive or secret nailed. This is achieved firstly by laying a 3mm or thicker purpose made underlay at 90° to the planned direction of the flooring, then laying the flooring and bonding the interlocking boards at the tongue and groove joints with a D3 grade moisture resistance PVAC adhesive.
IMPORTANT NOTE: Only engineered plank or strip flooring can be installed as a floated floor. Engineered Parquet Floors such as Herringbone, Chevron and Design Panels must be installed as a fully bonded floor using flexible adhesive. If you are unsure at time of install please contact us for more information.
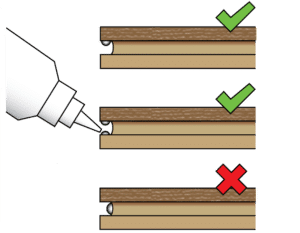
When bonding tongue & groove parquet PVAC adhesive should be applied evenly with a continuous bead, along the top of the grooved joint. The following panel (tongue) should be firmly pressed in to the groove to ensure a tight fit. A wooden block can be used to assist and to prevent damage to the tongue. If extra strength is required PVAC adhesive should be applied evenly to both top and bottom of the groove. Do not inject adhesive into the base of the of the groove (e.g. as the groove edge of the boards face upward vertically) as this may prevent the tongue and groove joints from closing.
NOTE: Its is strongly recommended that both header and length joints be bonded with PVAC and NEVER spot glue, to avoid weakness and potential gapping as the floor naturally expands and contracts.
Underlay & Damp Proofing
It is strongly recommended that a purpose made impermeable moisture barrier is used below floating wood floors. The moisture membrane may be used in the form of 1000 gauge polythene damp proof membrane for concrete which is laid over the sub-floor before the underlay, then flooring is laid. Alternatively an underlay which incorporates a moisture resistant barrier may be used. In either case the moisture membrane is taken vertically up the wall and trimmed off above the finished level of the wood floor surface. All moisture barriers must be taped at the joins with a purpose made jointing tape. Polythene damp proof membranes are overlapped by 200 mm or greater before joins are taped.
Floated Installation – Important Notes
- Halls are better suited to fully bonded installation than floating.
- If installing as a floating floor in L-shaped areas, in commercial use, or over under floor heating ensure that the joints are double bonded with adhesive applied to the upper and lower portion of the groove.
- Where necessary use flooring straps to achieve closed joints.
- Flooring must not be exposed to artificial heat sources such as from heated pipes at shallow depth below screeds, or suspended pipes below floorboards. Pipes must be thoroughly insulated.
Provision For Expansion – Important Note
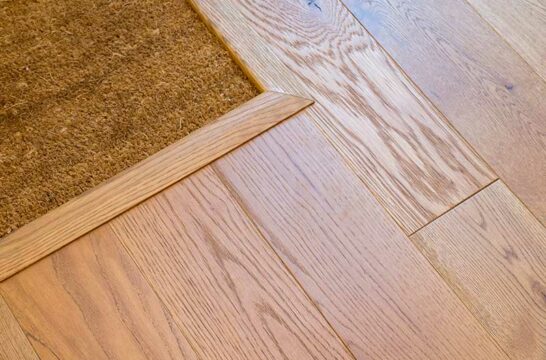
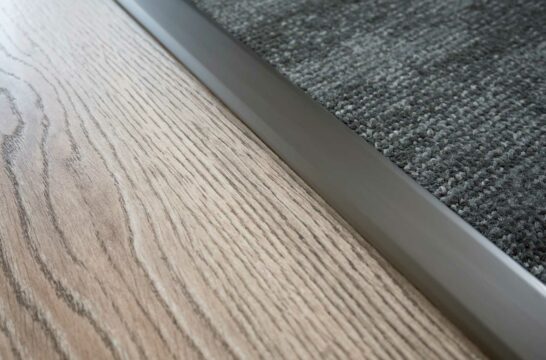
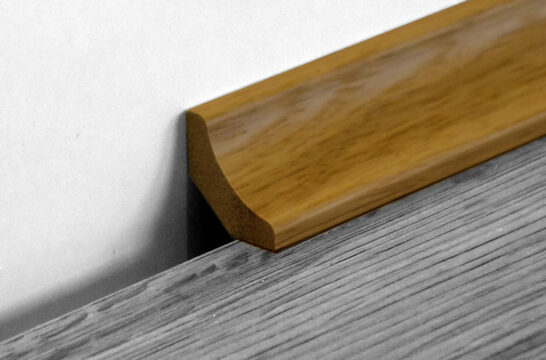
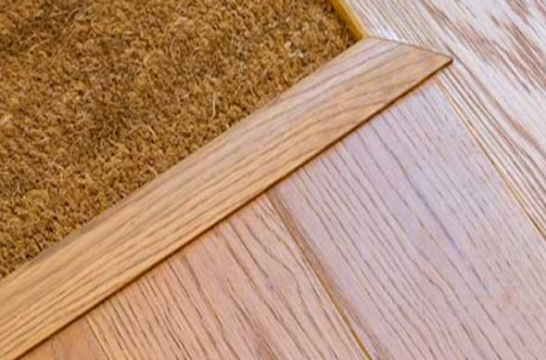
Wood flooring is affected by seasonal climactic changes and will expand and contract, so it is important to allow room for this expansion. Expansion spaces of minimum 12mm for floors less than 25m2 or minimum 15 mm for larger areas must be left wherever the floors meets obstructions including all walls, door frames, thresholds, structural support, fireplaces etc. These expansion gaps can be covered using the skirting, or edge trim (e.g. Scotia, Quadrant). It is recommended that an expansion break is always employed where rooms join. T- Bar threshold strips can be used for this purpose. Alternatively where wood floors meet other floor coverings a suitable Reducer threshold strip may be used.
Step 6 – Fully Bonded Installation
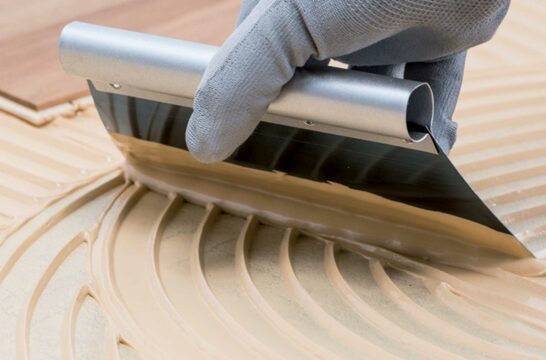
Engineered wood flooring may be installed direct to concrete or sand-cement screed sub-floors, or to suitable wood based sub-floors (e.g. Plywood, OSB) by fully-bonding with a purpose made permanently flexible adhesive (e.g. 1 component Polyurethane or SMP). Mapei Ultrabond Eco S948 1K adhesive is fully tested with all V4 Wood Flooring products and is recommended. The adhesive is applied to the sub-floor only using a V-notched trowel, which creates ridges of adhesive which the flooring is bedded into when laid. Always use the trowel type which is recommended by the manufacturer of the flooring adhesive for the type of wood flooring being installed and replace worn trowels.
Fully Bonding – Important Notes
-
- When installing flooring uplift occasional boards after placement and examine the residues of adhesive on the underside of the board to ensue the board is making full with the bed of adhesive.
- For UFH hot water system embedded into concrete full bond is recommended as it improves the TOG rating.
- Previous floor coverings and the adhesive residues used to adhere floor coverings to sub-floors must be removed before bonding of wood flooring.
Ensure screeds are of adequate cohesion strength of before installation.
- Avoid accelerated drying of new screeds as this can lead to poor cohesive strength, especially over under floor heating.
- Always check the recommendations of the applicable adhesive manufacturer, esp. regarding other sub-floors. e.g. asphalt, anhydrite etc.
- Some chipboard products have a moisture resistant treatment which can seriously impair adhesion. A layer of plywood may be laid over and securely fixed to the chipboard before installation may commence.
- Any residues of MS type adhesives which come into contact with the face of the board must be removed whilst wet, as cured residues are not removable.
- Concrete slabs if fully bonding down engineered flooring must be 65% relative humidity. Testing of subfloors must comply with BS8201 Code of practice for wood based products \u0026amp; BS 8204 Screeds, bases and in situ flooring.
Provision For Expansion – Important Note
Even fully bonded wood flooring is affected by seasonal climactic changes and will expand and contract, so it is important to allow room for this expansion. Expansion spaces of minimum 12mm for floors less than 25m2 or minimum 15 mm for larger areas must be left wherever the floors meets obstructions including all walls, door frames, thresholds, structural support, fireplaces etc. These expansion gaps can be covered using the skirting, or edge trim (e.g. Scotia, Quadrant). It is recommended that an expansion break is always employed where rooms join. T- Bar threshold strips can be used for this purpose. Alternatively where wood floors meet other floor coverings a suitable Reducer threshold strip may be used
