


Natureffect Mineral Core SPC Installation
Thank you for choosing our flooring. When properly installed and cared for, your new flooring will be easy to maintain and will keep its great look for years. The Natureffect® Floors SPC features an integrated underlay pad that is designed for a floating installation method and can be installed over existing floors provided they meet subfloor requirements listed below. The flooring is intended for interior use only and is suitable for above-grade, on-grade and below grade applications. The floors should not be installed in locations where the substrate below the building structure is exposed to the elements or where there are structural problems related to ongoing moisture exposure.
Download This Guide
INSTALLER/OWNER RESPONSIBILITY
Please read all the instructions before you begin the installation. Improper installation will void warranty.
GENERAL PREPARATIONS TOOLS REQUIRED:
Spacers, rubber mallet, ruler, pencil, tape measure, utility knife.
PRIOR TO INSTALLATION
- Inspect material in daylight for visible faults/damage, including defects or discrepancies in colour or shine; check the edges of the flooring for straightness and any damage. No claims on surface defects will be accepted after installation.
- It is preferable to lay boards perpendicular to the window, following the direction of the main source of light. For the best result, make sure to always work from 3 to 4 cartons at a time, mixing the planks during the installation.
- Check if subfloor/site conditions comply with the specifications described in these instructions. If you are not satisfied, do not install, and contact your supplier. An installed board with a visible defect is considered as being accepted.
- Flooring products can be damaged by rough handling before installation. Exercise care when handling and transporting these products. Store, transport, and handle the flooring planks in a manner to prevent any damage. Store cartons flat, never on edge.
- Flooring products can be heavy and bulky. Always use proper lifting techniques when handling these products. Whenever possible, make use of material-handling equipment such as dollies or material carts. Never lift more than you can safely handle; get assistance.
- Calculate the room surface prior to installation and plan an extra 5-10% of flooring for cutting waste.
- The environment where the flooring is to be installed is critically important regarding successful installation and continued performance of the flooring products.
- The flooring is intended to be installed in interior locations only. These interior locations must meet climatic and structural requirements as well.
- In most cases, this product does not need to be acclimated. However, if the boxes of flooring were exposed over 2 hours to extreme temperatures under 50°F / 10°C or over 104°F / 40°C within the 12 hours before the installation, acclimation is required. In this case, keep the boards in room temperature for at least 12 hours in unopened package before you start the installation. The room temperature must be maintained consistent between 70-80°F / 20-25°C a humidity range of 35-65%. before and during the installation.
- Flooring should only be installed in temperature-controlled environments. It is necessary to maintain a constant temperature of 70-80°F / 20-25°C before and during the installation. Portable heaters are not recommended as they may not heat the room and subfloor sufficiently. Kerosene heaters should never be used.
- After installation, make sure that the flooring is not be exposed to temperatures less than 50°F / 10°C or greater than 120°F / 50°C.
- For floor surfaces exceeding 1064 sq. ft. / 100 m2 and/or lengths exceeding 33 lineal ft. / 10 m, use expansion mouldings.
SUBFLOOR INFORMATION
- Inspect your subfloor before you begin, it must be structurally sound, clean, dry, flat, and smooth. High spots and bumps must be levelled. Deflections more than 1/8” / 3 mm within 6 ft. / 2 m radius must be levelled out with an appropriate levelling compound, the same applies to unevenness of more than 1/32” / 1 mm within 8” / 20 cm.
- Ceramic tile floors, ceramic and marble grout joints, and irregularities in concrete should be filled and levelled.
- Depressions, deep grooves, expansion joints and other subfloor imperfections that exceed 4mm wide & 4mm depth must be filled with patching & levelling compound.
- Substrates must be free from excessive moisture or alkali. Remove dirt, paint, varnish, wax, oils, solvents, any foreign matter and contaminates.
- Do not use products containing petroleum, solvents, or citrus oils to prepare substrates as they can cause staining and expansion of the new flooring.
- Although this floor is waterproof, it is not aimed to be used as a moisture barrier. The concrete moisture vapor emissions should not exceed 8 lb / 3.63 kg (ASTM F1869) / 90 % RH (ASTM F2170) with a PH limit of 9 / max. 2.5 % moisture content (CM method).
- This product is also not to be installed in areas that have a risk of flooding such as wet rooms, showers saunas or outdoor areas.
- Existing sheet vinyl floors should not be heavily cushioned and not exceed more than one layer in thickness. Soft underlayment and soft substrates will diminish the products inherent strength in resisting indentations.
CONCRETE SUBFLOORS
- Existing concrete subfloors must be fully cured, at least 60 days old, smooth, permanently dry, clean, and free of all foreign material such as dust, wax, solvents, paint, grease, oils, and old adhesive residue. Curing agents and hardeners could cause bonding failure and should not be used.
- We recommend using a minimum 6 mil / 0.15 mm poly-film as a moisture barrier between the concrete subfloor and the flooring.
WOODEN SUBFLOOR
Check the floor for signs of mould and/or insect infestation. Make sure that the screed is levelled and nail down any loose parts. If necessary, apply a levelling floor or levelling compound to optimally prepare the covering floor. It is essential that the crawl space between the floor and the wooden screed is always ventilated. Remove any obstacles and ensure sufficient ventilation (minimum 4 cm² total ventilation opening per m² of floor). Always check the moisture content of the wooden floor. This may not be more than 14%. MOISTURE IN THE SUBFLOOR Although the Natureffect Flooring are insensitive to moisture, they are not intended for use as a moisture-inhibiting or waterproof system. In case of moisture, the screed must be sufficiently dried out or made vapour-tight before the Natureffect floor is installed. Moisture or rising residual moisture under the floor can lead to unhealthy mould formation and/or push up the floorboards with the chance of permanent deformation.
DO NOT INSTALL OVER
Carpet, needle felt, cushion vinyl, floating floors of any kind; parquet, solid and engineered hardwood over concrete; sleeper substrates. Do not install over existing wood flooring glued to concrete.
IMPORTANT NOTICE: INSTALLATION OVER UNDERFLOOR HEATING
- Flooring can be installed over 1/2” / 12 mm embedded radiant heat using the floating method. Maximum operating temperature should never exceed 82°F / 28°C. Use of an in-floor temperature sensor is recommended to avoid overheating.
- Turn the heat off for 24 hours before, during and 24 hours after installation when installing over radiant heated subfloors.
- Before installing over newly constructed radiant heat systems, operate the system at maximum capacity to force any residual moisture from the cementitious topping of the radiant heat system.
- Make sure that the temperature in the room is maintained consistent between 70-80°F / 20-25°C before and during the installation.
- Floor temperature must not exceed 82°F / 28°C. • If there is a temperature difference of 12°C or more between different rooms, an expansion joint must be provided. This also applies to surfaces where there is underfloor heating in one room and not in the other. These two floor parts can expand differently, with tension as a result.
- Once the installation has been completed, the heating system should be turned on and increased gradually (5-degree increments) until returning to normal operating conditions.
- Refer to the radiant heat system’s manufacturer recommendations for additional guidance.
- WARNING: Electric heating mats that are not embedded into the subfloor are not recommended for use underneath the floors. Using electric heating mats that are not embedded and applied directly underneath the floors could void the warranty for your floor in case of failure. It is best to install the flooring over embedded radiant floor heating systems and adhere to the guidelines listed above.
INSTALLATION
- Remove baseboard, quarter-round mouldings, wall base, appliances, and furniture from room. For best results, door trim should be under-cut to allow flooring to move freely without being pinched. After preparation work, sweep and vacuum the entire work Natureffect to remove all dust and debris.
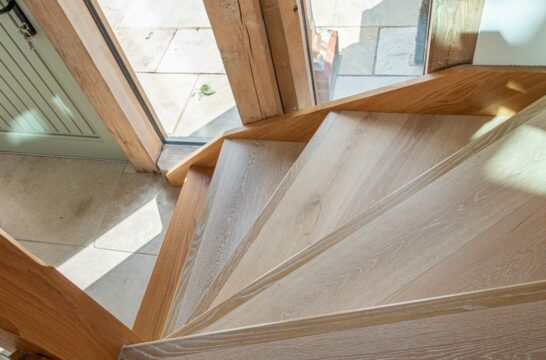
- With a floating floor, you must always ensure you leave a 1/4” / 6 mm gap between walls and fixtures such as pillars, stairs, etc. These gaps will be covered with trim mouldings after the floor is installed. Therefore, you may never glue, nail, or fix the floorboards to the screed, walls, or any other part of the room. Never use a silicone sealant or other flexible paste to fill the expansion joints.
- Whenever possible, plan the layout so that the joints in the planks do not fall on top of joints or seams in the existing substrate. The end joints of the planks should be staggered a minimum of 8” / 20 cm apart. Do not install over expansion joints. Avoid installing pieces shorter than 12” / 30 cm at beginning or end of rows.
- Do not install your kitchen cabinets directly over your floor. The SPC floor’s quality can be guaranteed if the floor can move freely.
- Decide the installation direction. It is recommended to install the boards perpendicular to the window following the direction of the main source of light.
- MOISTURE BARRIER
In high-moisture Areas, such as bathrooms, we recommend applying a water-tight foil (0,2mm) beneath underlayment. Although Natureffect Mineral Core SPC Flooring is completely water-resistant, water can always seep in between the joints or beneath the edge of the floor, permeating the underground and causing damage. Note: The screed must always be completely dry and meet the specified moisture values, even with a moisture barrier! - Measure the Natureffect to be installed: The board width of the last row shall not be less than 2” / 50 mm. If so, adjust the width of the first row to be installed. In narrow hallways, it is recommended to install the floor parallel to the length of the hall.
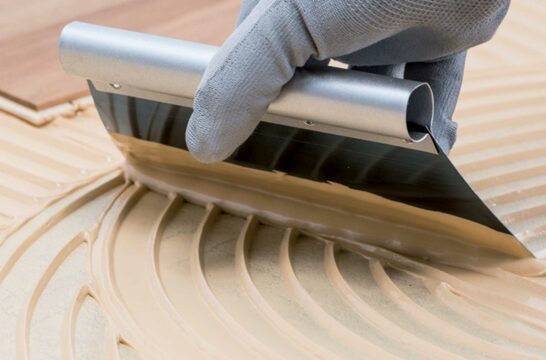
- UNDERLAY If the floor does not have a pre-attached underlayment, an additional underlayment is recommended in order to improve acoustic.
- Performance and absorb some irregularities on the substrate. Best results can be expected with an underlayment of 0.04” / 1 mm to max 0.06” / 1.5 mm thickness with a high density (>11.2 lbs / >180 kg / m3) and high compressive strength (>200kPa) that supports the click system during daily use. Existing underlay with a low density and an inadequate compressive strength could damage the locking mechanism and will void warranty. If the floor has a pre-attached underlayment, the use of an additional underlayment could damage the locking mechanism and will void warranty.
- To minimise shade variation, mix and install product from several different packs alternately. After laying a small quantity of product, view from a distance that allows you to clearly see the overall effect. If there is any doubt cease installation immediately and contact your retailer or Natureffect Floors representative
- From the left corner of the room put the first plank in place using spacer blocks against the walls to maintain the appropriate expansion gap so both the end and side seam grooves are facing outwards. Planks are to be installed from left to right. To assist in laying the first row straight, the use of masking tape across each short and locking system recommended. Continue this for the first two rows and remove after completion of installation.
- Install the second plank in the first row by engaging the tongue of new plank at a 30-degree angle into the indent of previously installed plank. Lock the planks together by lowing the new plank down, ensuring the joint is fitted tightly. There should be no gaps between the planks. Care must be taken to properly line up the end join and NEVER force the join while out of alignment, otherwise this could result in permanent damage to the end groove.
- Continue in this manner for the rest of the first row. The last plank in the row should be cut to length while maintaining the appropriate expansion gap along the perimeter of the room or fixed vertical surfaces.

- Cut a plank that is at least 200mm shorter than the first plank to start the second row or use the cut off from the previous row, keeping in mind the length requirements. Install the first plank in the second row by inserting the long side tongue into the groove of the plank in the first row at a low angle(30o) to installed plank. Then lower the plank while maintaining a slight pressure toward the installed plank. The planks should fit snuggly together and lay flat maintaining the appropriate expansion gap along the perimeter of the room or fixed vertical surfaces.
- To install the remaining planks in the second row, first position the board at a 30-degree angle to the previous board. Leaving a 20mm gap from the previous row of boards. Slide the plank to the left until it meets the previously installed plank, and the short edge tongue fits tightly into the existing boards indent.
- Lower the plank while maintaining a slight pressure towards the installed piece. The planks should fit snugly together and lay flat. Then raise planks in row so they are at a 30-degree angle to the previous row of planks with the tongues fitted tightly into the long edge indents of previous row. Lastly, lower row of planks down so that joints on the short and long edges are engaged. Planks should lay flat with no gaps between previous row or installed plank.
- Work across the length of the room installing planks in the second row. It is critical to keep these first two rows straight and square, as they are the “foundation” for the rest of the installation. Check often for squareness and straightness while installing the floor as failure to do so can result in gapping.
- Continue installing, being certain to maintain a random pattern repeat, as sited by offsetting end joints by at least 150mm. Maintain the appropriate expansion gap against all fixed vertical surfaces.
- Check to be certain all planks are fully engaged; if slight gapping is noticed or the planks will not lay flat, simply disengage the long/top side joint and then carefully slide the short/end joint apart. Do not pull up on this joint as it will damage the locking mechanism! Reinstall the plank.
- The last row (possibly the first row) plank width should be no less than 50mm on the long seam. Remember to allow for the appropriate expansion gap to the wall.
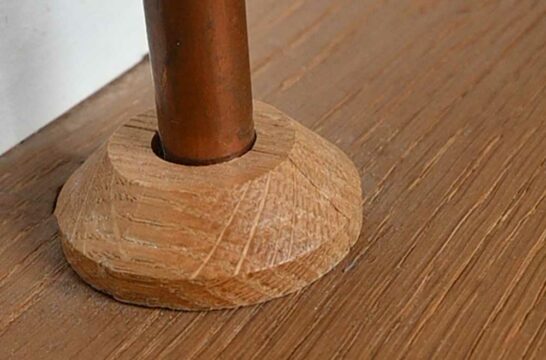
- Holes for pipes: measure the diameter of the pipe and drill a hole that is 20mm larger.
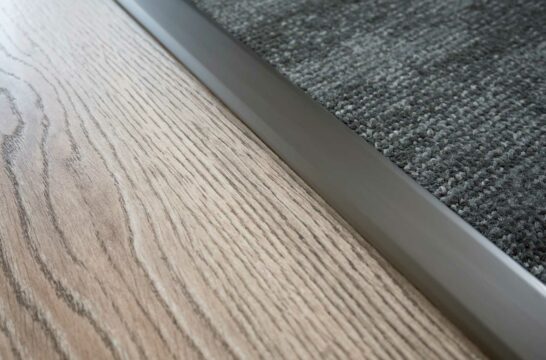
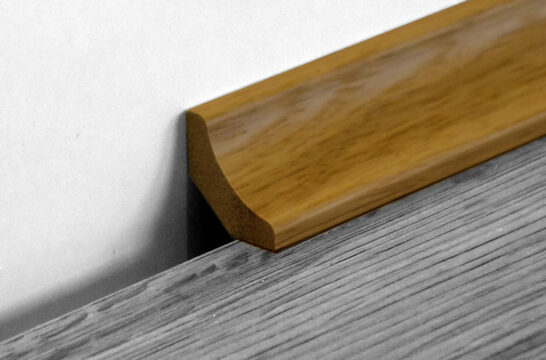
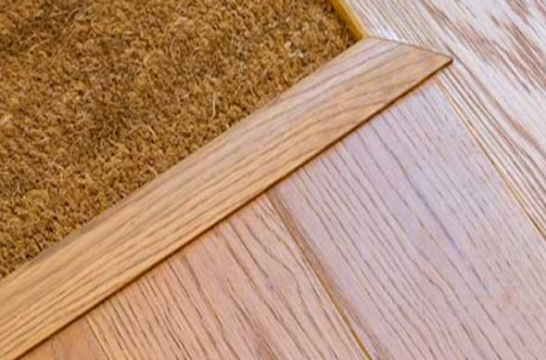
- Install wall mouldings and door transition mouldings last. Be sure that all mouldings are fastened directly to the wall or subfloor; do not place any fasteners through the floating flooring. Care must be taken when fitting wall mouldings that they do not push down on the floor. This will affect the floor’s ability to expand and contract and may lead to product failure.
INSTALLATION ILLUSTRATIONS
How to engage
- Start by positioning the plank at a 30-degree angle from the existing floorboard. Leave a 20mm gap from boards in the previous row.
- Slide the angled plank into an existing board(left) ensuring the tongue is fitted tightly into the indent of existing board.
- Lower the new board down gently so it is parallel with existing planks and securely engaged.
- Position new and existing planks in the row at a 30-degree angle from previous row of boards.
- Gently slide new plank down so that the tongue of new board is engaged tightly into indent of existing plank in previous row.
- Lastly, lower all planks down. There should be no gaps between planks.

FLOOR CARE TIPS
SPC floors are durable, but like all interior floor coverings require care periodically to look their best and prevent problems before they occur. The frequency will depend on your lifestyle and traffic on the flooring over time. Routine & Preventive Care
- DO Sweep, dust mop or vacuum (air suction only) regularly to remove loose dirt and grit. Do not use treated dust mops.
- DO NOT use a steam cleaner on the SPC floor.
- Avoid entering dirt, water, and sand by placing an adapted foot mat, on all entrances. This not only helps to prevent damage to your floor, but it also facilitates maintenance and extends the life of your Natureffect Flooring. When choosing a floor mat, please note that the backing of the mat does not consist of rubber or latex. These can cause discoloration of the Natureffect Flooring.
- Clean up spills or pet accidents immediately!
- If an additional cleaning product is used, choose a pH-neutral product (pH 7). Aggressive products can corrode the topcoat of the Natureffect Flooring and cause damage. Never use maintenance products that contain wax or oil. Do not use vinegar, polishes, abrasives, corrosive detergents, or solvents.
- Avoid exposure to long periods of direct sunlight. Close blinds or drapes during peak sunlight hours. SPC flooring subjected to excessive heat and light is subject to thermal degradation.
- Always maintain consistent room temperature of 65°- 85° F and relative humidity levels of 35%-55%.
- Do not expose the SPC flooring to temperatures exceeding 110° or temperatures below 32°F.
- Ensure that chairs or furniture with casters or wheels are easy swivelling with large surface non-staining casters and suitable for resilient floors use. Do not use ball type casters as they can damage the floor. Protective mats and chair pads are required under office chairs or furnishings with rolling casters.
- Ensure that frequently moved furniture is protected with felt pads to avoid scratching the floor.
- Heavy furniture and appliances should be equipped with non-staining large surface floor protectors. Use floor protectors under furniture.
- Use mats at entrances to prevent dirt and grit from being tracked on to the floor.
- Protect flooring in the kitchen area with a high-quality rug in Areas subject to hot oil spills or splatter. Use non-staining mats only. Rubber may discolour the floor.
- Do not use electric brooms with hard plastic bottoms without padding as these may damage the flooring.